Wednesday, December 31, 2014

Just Buzzin' By

This card makes me giddy.  I had so much fun bringing these little bees to life!  I saw a tutorial on Jennifer McGuire's blog for a faux laser cut card this morning and just had to try it.  Unfortunately, I don't have any large detailed dies like she used, so I pulled out my hexagon cover plate instead.  It looks like honeycomb, which set me on the path to this finished card.


So much fun!  I went looking through my inventory for bee-related images and stumbled across this old retired Stampin' Up set called Just Buzzin' By.  I bought it at a used stamp sale ages ago.  (My NBUS, or never-before-used, stash is a bit ridiculous.)  I love the darling bees and the large sentiment.  It just begged to be used with the faux honeycomb laser cut! 

I stamped my sentiment at the bottom of the white panel and then stamped the flying bee right next to it.  I stamped the same bee on white scrap and colored it with Copic markers, cutting out just the body for paper piecing.  I added shimmer to the wings with a Wink of Stella pen.


I bent the wings just slightly to add a little extra dimension.  I also shaded just a bit around the bee image with a Copic marker.  Then I decided that I needed to add a couple more bees around the honeycomb circle, so I stamped two more bees and cut them out after coloring.  Those tiny antennae and legs were a bit tricky!


Love!  The Wink of Stella wings are so shimmery in person.  I had considered using vellum, but I really like how these turned out instead.  I used foam tape to add the whole panel to a Harvest Gold card base.  To add just a bit more texture, I stamped behind the circle with a netting background stamp using VersaMark Dazzle ink.  It's subtle, but it really adds to the honeycomb look.

For the inside of my card, I cut the word "hello" out of black cardstock using a Lil' Inker die.  I stamped another bee standing on top of one of the letters.  I stamped it again out of white cardstock, colored it with Copic markers and Wink of Stella, and cut out just the body/wings for paper piecing.  Love how it looks!


It's a little unexpected surprise when you open the card.  Like I said before, it makes me giddy!  I had so much fun making this card.  Spending the afternoon being creative in my studio was a great way to send off the old year.  We have family friends coming over this evening to play games and ring in the new year.  I'm really looking forward to it.   I hope you have a wonderful New Year's Eve!


Stamps:  Just Buzzin' By, Netting (Stampin' Up)
Ink:  Tuxedo Black (Memento); VersaMark Dazzle Frost
Paper:  White, Harvest Gold, True Black (Papertrey Ink)
Copic:  0, C1, E00, E30, T6, Y21, YR23, YR24
Misc:  Standard Circles Large die (Spellbinders); Hexagon Cover Plate die (Papertrey Ink); Hello Word die (Lil' Inker); clear Wink of Stella pen; foam tape


Tuesday, December 30, 2014

Looking Back: Some Favorite Projects From 2014

It's time for a little reflection and look back at some of my favorite projects from 2014.  I'm choosing fourteen in honor of the year.  I haven't been entirely consistent, but I've still managed to post quite a bit.  It's been a good year!  Just click on the pics if you want to see more details in the original posts.

This was my first project using my Silhouette Cameo.  I love the bare birch trees with the little red birds.  Even in the stark winter, there is beauty if you just look for it.

http://mapleberrymusings.blogspot.com/2014/01/new-year-new-card.html

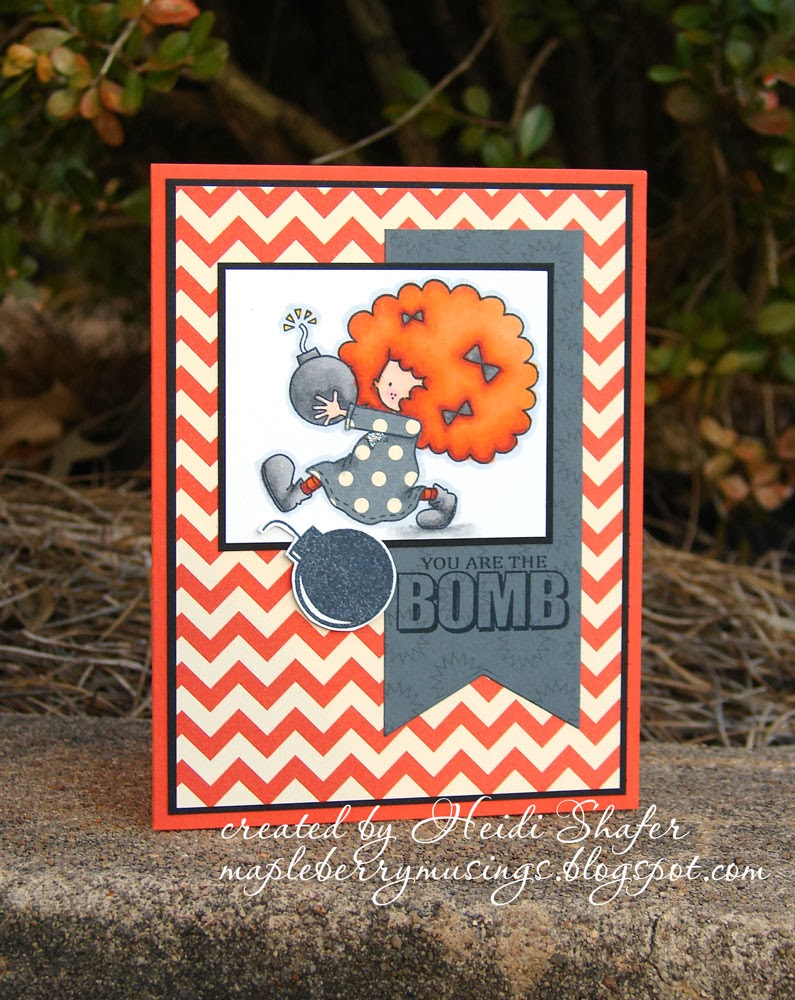
This card makes me smile every time I look at it.  I love her bright ginger hair and the fun chevron pattern.  I only have a few There She Goes sets, since they went out of business, but this is my favorite one.  The images are so much fun! 

http://mapleberrymusings.blogspot.com/2014/01/you-are-bomb.html

I also used my Silhouette for this card, along with a few dies.  I love this scene and all the texture, plus those two adorable birds!

http://mapleberrymusings.blogspot.com/2014/01/two-birds-on-fence.html

I made this card for my husband using a Viva La Verve sketch and it received a mention on their blog.  So cool!  It's one of my top favorites from this year.

http://mapleberrymusings.blogspot.com/2014/01/you-make-my-heart-flutter.html

I made this sweet card for a PTI blog hop.  It's always fun to create your own patterned paper using different stamps and colors.  I don't use ribbon often, but it was just perfect on this card.

http://mapleberrymusings.blogspot.com/2014/01/sweet-friend.html

I love this color combo.  Simple, but very striking.  I made this card for one of the PTI anniversary challenges.  Love the flourishes!

http://mapleberrymusings.blogspot.com/2014/02/pti-7th-anniversary-day-6-so-very.html

Earlier this year, I was asked to make three custom baby cards for a friend.  This one was my favorite.  Getting those letters lined up right took a few tries!

http://mapleberrymusings.blogspot.com/2014/02/precious-elliott.html

I went to a card-making workshop this year, and this was my favorite card of the bunch.  I love the watercolor look, the colors, and that bold sentiment.

http://mapleberrymusings.blogspot.com/2014/07/watercolor-thanks.html

This is just one of a set of thank you cards I made for a baby gift.  Click on the picture to see the rest, as well as the gift bag, in the original post.  I still need to make some for myself!  I love this simple design.

http://mapleberrymusings.blogspot.com/2014/07/thanks-card-set.html

Not my usual style, but I love this card.  It was made for a PTI blog hop, where the challenge was an inspiration picture.  I had fun choosing patterns and paper-piecing this tag. I sent this card to a friend who is going through a challenging time.

http://mapleberrymusings.blogspot.com/2014/07/doily-friend.html

My daughter and I participated in the PTI Stamp-a-Faire event back in August and managed to each make ten cards in one weekend.  This is my favorite.  I love the faux fresco technique and definitely need to do it again!

http://mapleberrymusings.blogspot.com/2014/08/stamp-faire-2014-ancient-rome-faux.html

I made this card for Stamp-a-Faire as well.  It was fun creating the sparkly rhinestone centerpiece.  Plus, I really love the art deco style!

http://mapleberrymusings.blogspot.com/2014/08/stamp-faire-2014-1920s-rhinestones.html

Here's yet another PTI blog hop card.  I try to participate every month.  I love the colors, that bubbly background, and the pretty button flowers.

http://mapleberrymusings.blogspot.com/2014/09/berry-bouquet.html

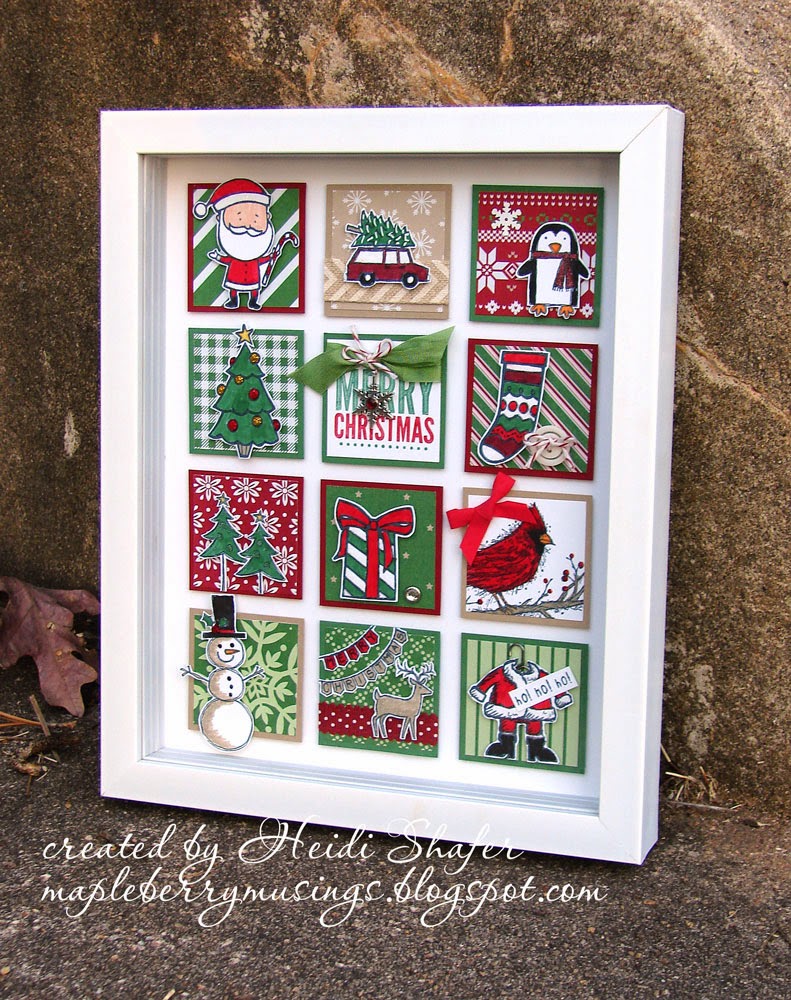
Both of these stamped art frames were major projects this month and only posted on my blog a week ago.  Still, they definitely rank as my favorite projects this year.  I have them on small easel stands in my studio and kitchen at the moment.  They make me smile every time I see them.  I couldn't pick just one of them for my fourteenth choice, so you get a two-for-one.  :)

http://mapleberrymusings.blogspot.com/2014/12/stamped-art-santa-frame.html

http://mapleberrymusings.blogspot.com/2014/12/stamped-art-snow-frame.html

So there you have it.  A small sampling of my work this past year.  It's always good to look back and be reminded of what I've made.  It helps to combat that darn inner critic that starts whispering every time I enter the studio.  Besides creating projects, I also spent a lot of time organizing my stash.  I enjoy doing that almost as much as I enjoy stamping!  It's been a good year and I look forward to the brand new year ahead.

Workshop Tags: Glitter Tree

Woohoo!  Here's the last one!  Can you believe how many tags I got to make at that workshop?  I actually made two of these, but couldn't find one of them when I was taking the photo.  They are the same, so it really doesn't matter.


A crumb cake tag was pre-cut for me.  I hand cut the three snowy hill layers and glittered the top edges before gluing them to the tag.  The glittery green tree was popped up with dimensionals.  Then I just stamped a small to/from sentiment above.

I had so much fun making all these tags!  Our family used all but one of them for our Christmas presents under the tree.  Thanks to my Stampin' Up demo for a fabulous workshop!

Stamps:  unknown sentiment (Stampin' Up)
Ink:  Tuxedo Black (Memento)
Paper:  Crumb Cake, Whisper White, Soft Sky, unknown blue; green glitter paper (Stampin' Up)
Misc:  unknown tag die (Stampin' Up); Crystal fine glitter (Martha Stewart); ribbon; dimensionals

Workshop Tags: Snowmen

These two tags use a darling snowman from Snow Much Fun, one of my favorite sets.  I colored each one a little differently using Blendabilities markers.


This first one was colored with the Coastal Cabana trio for the hat and scarf, and one of the Winter Wisteria markers for the shading.  The boots are Smoky Slate and the carrot nose is Pumpkin Pie.  (if I remember correctly)  I added glitter on top of the snowman shading and the snowball.

The snowman was stamped on a white snowflake die cut, and a matching Coastal Cabana snowflake was layered slightly off-set.  A bit of cord was threaded through the hold and tied with some twine.  I stamped a large to/from sentiment on the back.


This snowman was colored with the Winter Wisteria trio for the hat and scarf, and one of the Coastal Cabana markers for the shading on the body.  As before, a Pumpkin Pie marker was used for the carrot nose and Smoky Slate for the boots.  Glitter was added on top of the shading for snowy sparkle.  I stamped a small to/from sentiment above the snowman and threaded grey chevron ribbon through the slit, tying it off with some cord.


Stamps:  Snow Much Fun, unknown sentiment (Stampin' Up)
Ink:  Tuxedo Black (Memento)
Paper:  Whisper White (Stampin' Up)
Blendabilities markers:  Coastal Cabana, Winter Wisteria, Pumpkin Pie, Smoky Slate (Stampin' Up)
Misc:  unknown tag die, unknown snowflake die (Stampin' Up); ribbon; cord; Crystal fine glitter (Martha Stewart)

Monday, December 29, 2014

Workshop Tags: Tree

We're getting closer to the end of the tags from the workshop at my Stampin' Up demo's house.  Just a few left to post.  These two tags use the Festival of Trees stamp set from the holiday mini.


I stamped four different trees on white cardstock, two with Garden Green and two with Cherry Cobbler.  Then I punched them out with the matching Tree punch.  A to/from sentiment was stamped on a layered scallop oval.


A piece of Trim the Tree patterned paper was adhered to either a Garden Green or Cherry Cobbler tag cut using the Scalloped Tag Topper punch.  Then the trees were added, using dimensionals to pop up one of them.


I added a piece of red chevron ribbon through the tag hole and tied the sentiment on with a bit of white twine.  These tags turned out fun and colorful!


Stamps:  Festival of Trees, unknown sentiment (Stampin' Up)
Ink:  Garden Green, Cherry Cobbler (Stampin' Up)
Paper:  Garden Green, Cherry Cobbler, Whisper White, Trim the Tree dsp stack (Stampin' Up)
Misc:  Scalloped Tag Topper punch, Tree punch (Stampin' Up); oval and scalloped oval die; red chevron ribbon; twine; dimensionals

Workshop Tags: Wreath

I love the Wondrous Wreath set in the holiday mini.  I used it to make these two tags at my demo's house as part of the tag workshop.  She was having trouble with her Big Shot, so only one of them got cut out with the framelits.  I hand cut the other one when I got home.


I think the wreath was stamped in Pear Pizzazz and Garden Green.  (again, I am guessing here)  I stamped the berries in Real Red, and then added red Stickles on top.  I have to have the glitter!  I stamped a to/from sentiment and placed a red bow after the Stickles had dried.


Stamps:  Wondrous Wreath, unknown sentiment (Stampin' Up)
Ink:  Pear Pizzazz, Garden Green, Real Red (Stampin' Up)
Paper:  Whisper White (Stampin' Up)
Misc:  Wonderful Wreath framelits die (Stampin' Up); red ribbon; Xmas Red Stickles


Workshop Tags: Stars

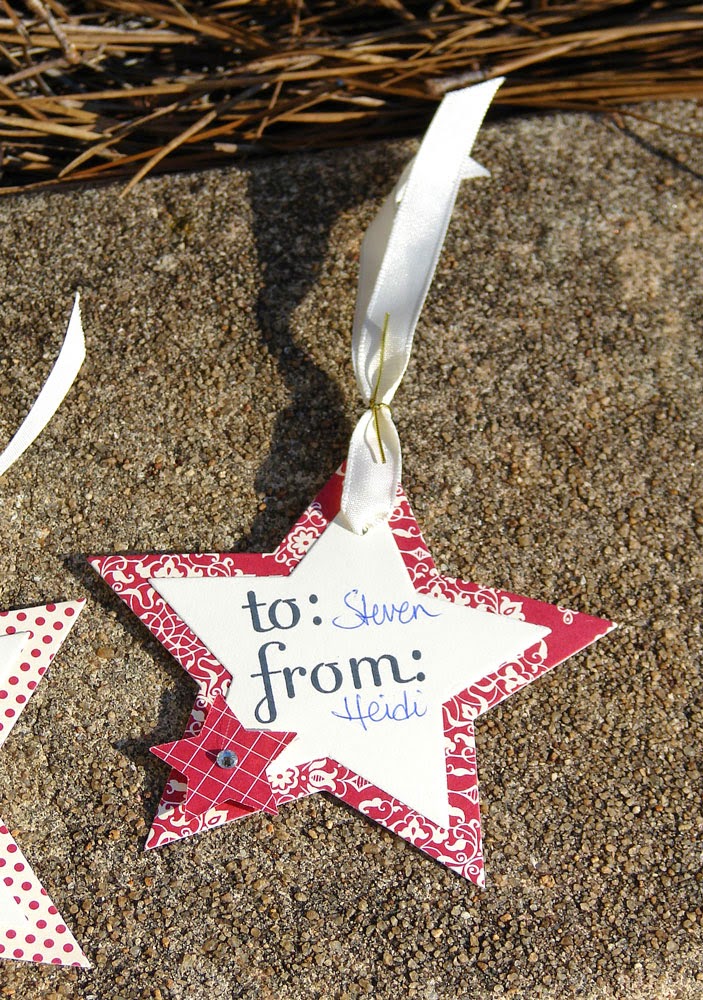
I made two sizes of star tags at the Stampin' Up workshop.  These were really quick and easy.  It wouldn't take long to do a bunch of these.


I think they were cut with the Stars Framelit dies.  These were already cut for me, so it was a simple matter of stamping the sentiment and gluing it all together.  The tiny patterned paper stars were popped up for dimension with a rhinestone in the center.


I punched a hole and added some cream satin ribbon.  The smaller tag's ribbon was tied with a bit of gold cord.


Stamps:  unknown sentiment (Stampin' Up)
Ink:  Tuxedo Black (Memento)
Paper:  Very Vanilla, unknown dsp (Stampin' Up)
Misc:  Stars Framelits dies (Stampin' Up); hole punch; ribbon, gold cord, rhinestones

Sunday, December 28, 2014

Workshop Tags: Cardinal

Here are two more tags from the workshop I attended at my Stampin' Up demo's house.  I love this sweet cardinal on a branch.  It's stamped on a Chalk Talk die cut.


I colored the cardinal with Real Red and Cherry Cobbler markers.  I think Pumpkin Pie was used for the beak, but I'm not sure what color I used for the tree branch.  Xmas Red Stickles were used for the glittery berries.

Some pretty red chevron ribbon was threaded through the tag slit and a small scalloped oval tag was tied to it with twine.


Stamps:  Beauty of the Season, unknown sentiment (Stampin' Up)
Ink:  Tuxedo Black (Memento)
Paper:  Whisper White, Real Red (Stampin' Up)
Misc:  Chalk Talk die (Stampin' Up); unknown oval and scalloped oval die; chevron ribbon, twine (Stampin' Up); Xmas Red Stickles

Workshop Tags: Reindeer

This is a cute little tag.  There were two of them originally, but I used one in a package sent to my missionary son. 


I think a die was used for the red piece, but I'm not sure since it was already cut for the workshop.  I stamped the reindeer from Color Me Christmas inside and colored him with markers.  Once home, I decided to add red glitter to his nose.  After all, Rudolph's nose is supposed to glow!  :)


Stamps:  Color Me Christmas, unknown sentiment (Stampin' Up)
Ink:  Tuxedo Black (Memento)
Paper:  Very Vanilla, Cherry Cobbler (Stampin' Up)
Markers:  Cherry Cobbler, unknown colors (Stampin' Up)
Misc:  natural/old olive two-tone trim (Stampin' Up); unknown die (Stampin' Up); Xmas Red Stickles

Workshop Tags: Pinecone

Here's the next set of tags from the workshop.  I used an old retired Stampin' Up set called Peaceful Wishes, one of my favorites, and Tags Till Christmas.


I think this color is Pear Pizzazz.  I don't have a list of supplies, unfortunately, so I'm just guessing.  I stamped the pine branches in Pear Pizzazz and the pinecones in Early Espresso.  I used the matching markers to stamp the smaller tag in two colors.


I added glitter to the branch and pinecone on the smaller tag, which was popped up to add dimension.  The upper corners of the tag were done with an old SU punch.  Some pretty Pear Pizzazz seam binding ribbon was tied into a bow as a last step.


Stamps:  Peaceful Wishes, Tags Till Christmas (Stampin' Up)
Ink:  Pear Pizzazz, Early Espresso (Stampin Up)
Paper:  Whisper White, Pear Pizzazz (Stampin' Up)
Misc:  Pear Pizzazz, Early Espresso markers (Stampin' Up); Decorative Label punch, unknown punch (Stampn' Up); Pear Pizzazz ribbon (Stampin' Up); Crystal fine glitter (Martha Stewart)

Saturday, December 27, 2014

Workshop Tags: Santa's List

Here's another Santa tag I made at the workshop.  This time I used Santa's List from last year's holiday mini. 


The Santa image was stamped in black and colored with a Real Red marker.  The sentiment was stamped to the side.  I stapled a bit of red chevron ribbon to the scalloped oval, and then added glitter to Santa's fur.


I actually made another tag using this image, but I didn't really like how it turned out so I'm not posting it.  I did use it on a present though!  lol  Waste not, want not.

Stamps:  Santa's List, unknown sentiment (Stampin' Up)
Ink:  Basic Black (Stampin' Up)
Paper:  Whisper White (Stampin' Up)
Misc:  scalloped oval die; Crystal fine glitter (Martha Stewart); red chevron ribbon, staple

Workshop Tags: Santa

I finally took some pictures of all the tags I made at a workshop put on by my Stampin' Up demo.  They really came in handy for presents this year.  I'll post them over the next few days.  This first set uses the cute Santa from the Get Your Santa On stamp set in the holiday mini.


I started with a white scalloped oval, stamping the Santa image in black.  I colored him with markers and then added glitter to the fur.  I stamped a layered oval tag with "to..from" and tied it with gold cord.  It was then tied to the red ribbon threaded through the main tag.  Really simple, but very cute!


You can really see the dimension the glitter adds in the close-up.  I made these and all the other tags at the workshop, but due to time constraints, I did all the glittering at home.


Stamps:  Get Your Santa On, unknown sentiment (Stampin' Up)
Ink:  Basic Black (Stampin' Up)
Paper:  Whisper White, Real Red (Stampin' Up)
Misc:  scalloped oval dies; red ribbon; gold cord; Crystal fine glitter (Martha Stewart)